Use Cases
Featured
Guides
Announcements
Case Studies
Setting up DeepSeek R1 on Azure AI Foundry: A Complete Guide (February 2025)
Feb 6, 2025

With Microsoft’s recent release of DeepSeek R1 on Azure AI Foundry, developers and AI enthusiasts have a unique opportunity to experiment with this powerful model at no cost (for now). As someone who’s just gone through the setup process, I want to share a detailed guide to help you get started.
Why DeepSeek R1 Matters
DeepSeek R1’s release represents a significant market shift in AI services. The model delivers similar capabilities to OpenAI’s O1 at approximately 4% (!!) of the cost, while being widely available across major platforms including Amazon Bedrock, Fireworks.ai, Kluster.ai, and OpenRouter.ai.
This dramatic cost reduction particularly impacts applications requiring complex reasoning and business logic processing. As AI compute becomes commoditized like cloud storage or processing power, providers will compete primarily on speed, throughput, and cost.
This democratization of AI compute makes advanced automation and decision-making systems practical for a broader range of organizations, not just large enterprises with substantial AI budgets. The result will likely be accelerated adoption of AI agents and automated systems across various industries as the barrier to entry continues to drop.
Photo by Solen Feyissa on Unsplash
Prerequisites: Getting Your Azure House in Order
First, ensure you have an active Azure subscription. Head to portal.azure.com and check your subscription status in the top-right corner. If you’re new to Azure, you can start with a free trial or pay-as-you-go plan.
Setting Up Your Azure AI Foundry Environment
The setup process follows a hierarchical structure, starting with a Hub and then creating Projects within it. Think of a Hub as your master container that manages security, connectivity, and compute resources. Here’s how to set it up:
Creating Your Hub
Navigate to Azure AI Foundry by using the search bar at the top of the Azure Portal. When you’re there:
Click the “+ Create” button and select “Hub.”
Choose a descriptive name for your Hub — something that reflects its purpose, like “DeepSeekTestingHub”.
Select your subscription and resource group (create a new resource group if needed)
Pick a region close to your location for optimal performance
Click “Review + Create” and wait for deployment

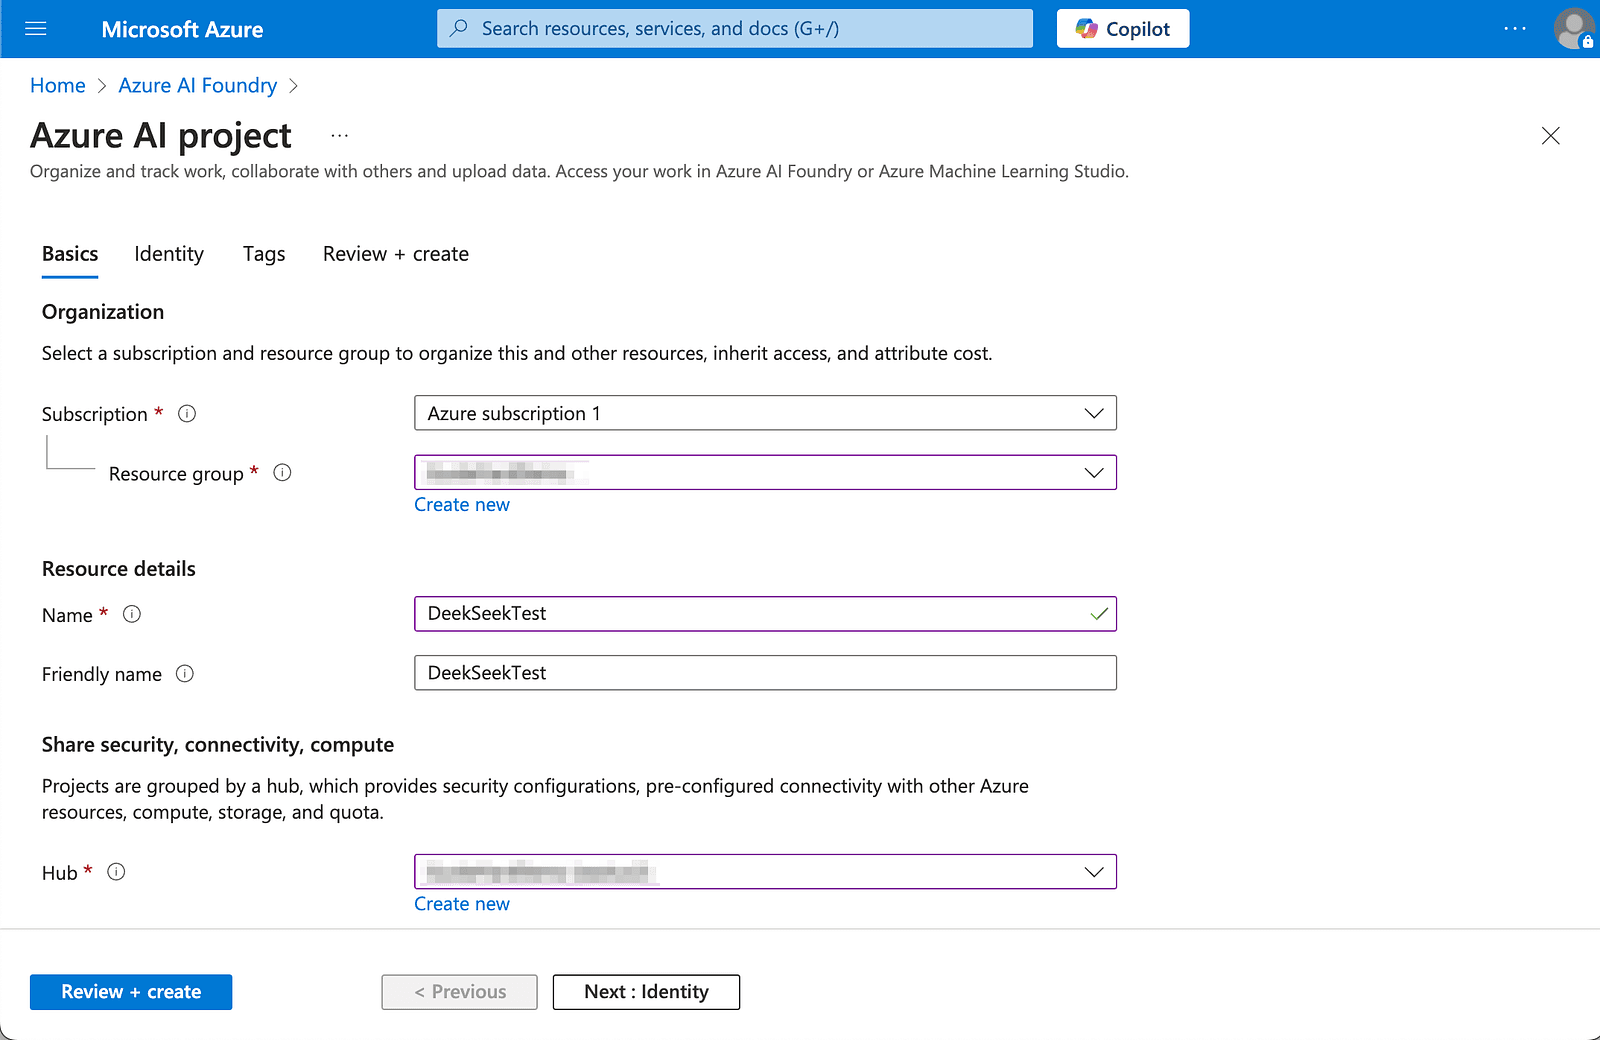
Establishing Your Project Inside the Hub
Once your Hub is ready, you’ll need to create a Project within it. This is where you’ll actually work with DeepSeek R1:
Open your newly created Hub Click “+ Create”
Select “Project” Name your project something clear and descriptive
If prompted, configure your compute settings
Click “Review + Create” and wait for deployment
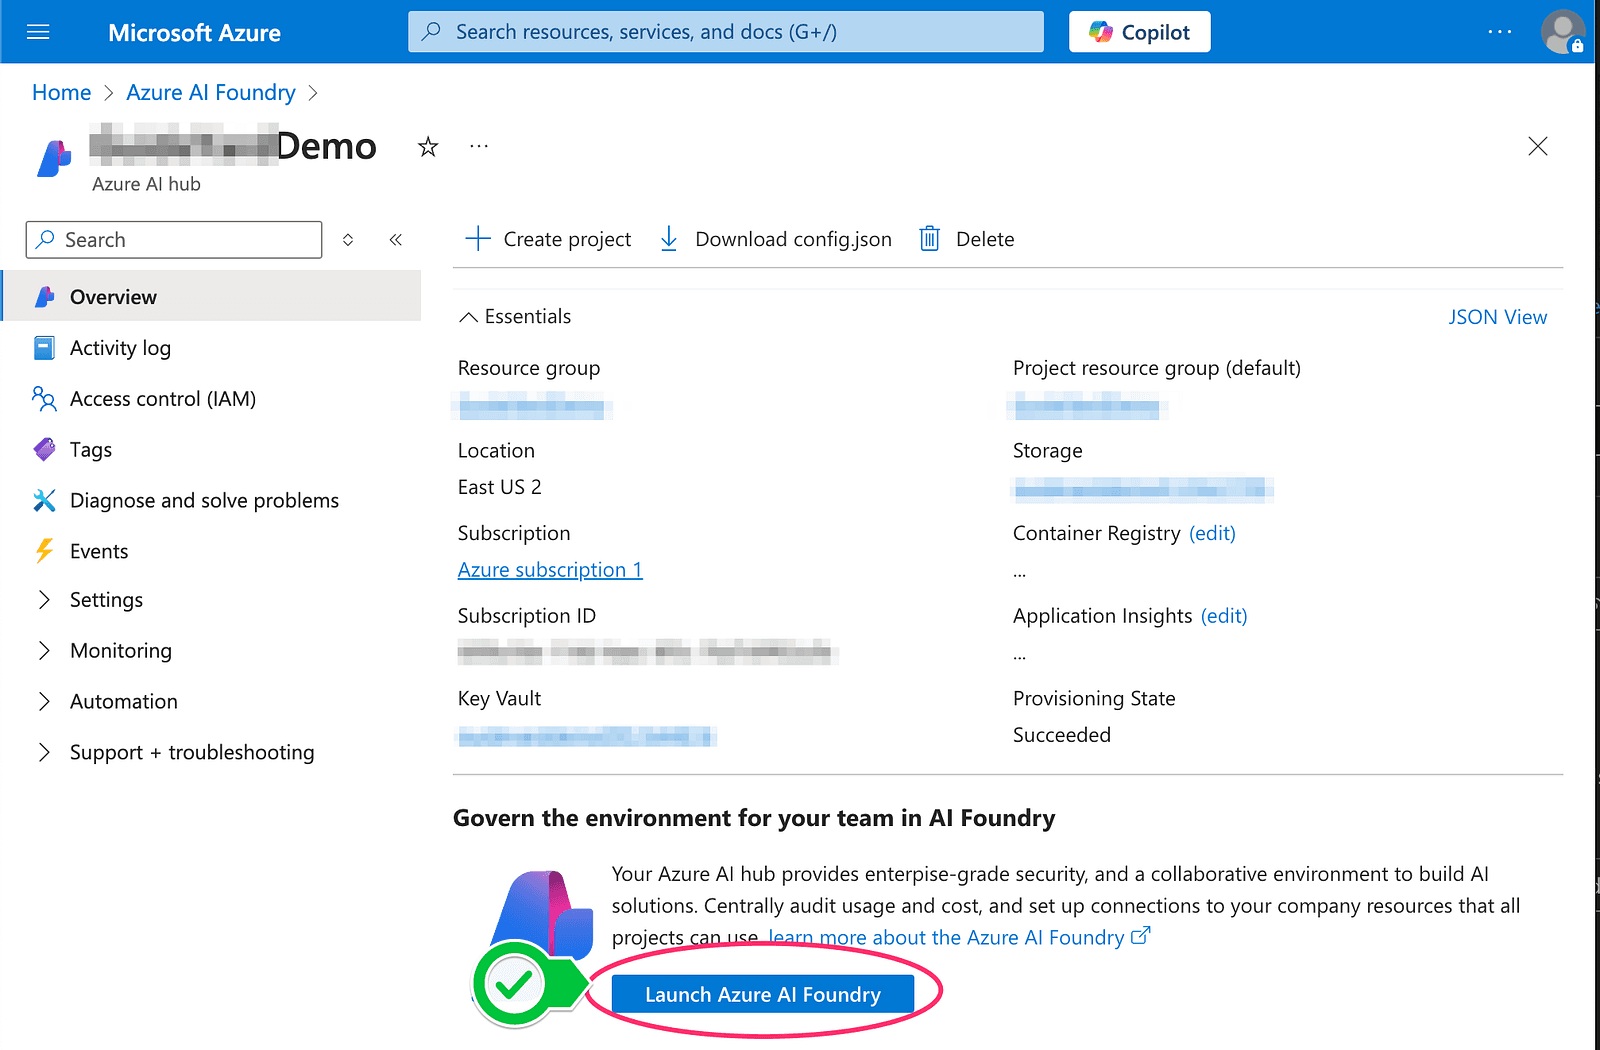
Deploying DeepSeek R1
The deployment process is surprisingly straightforward:
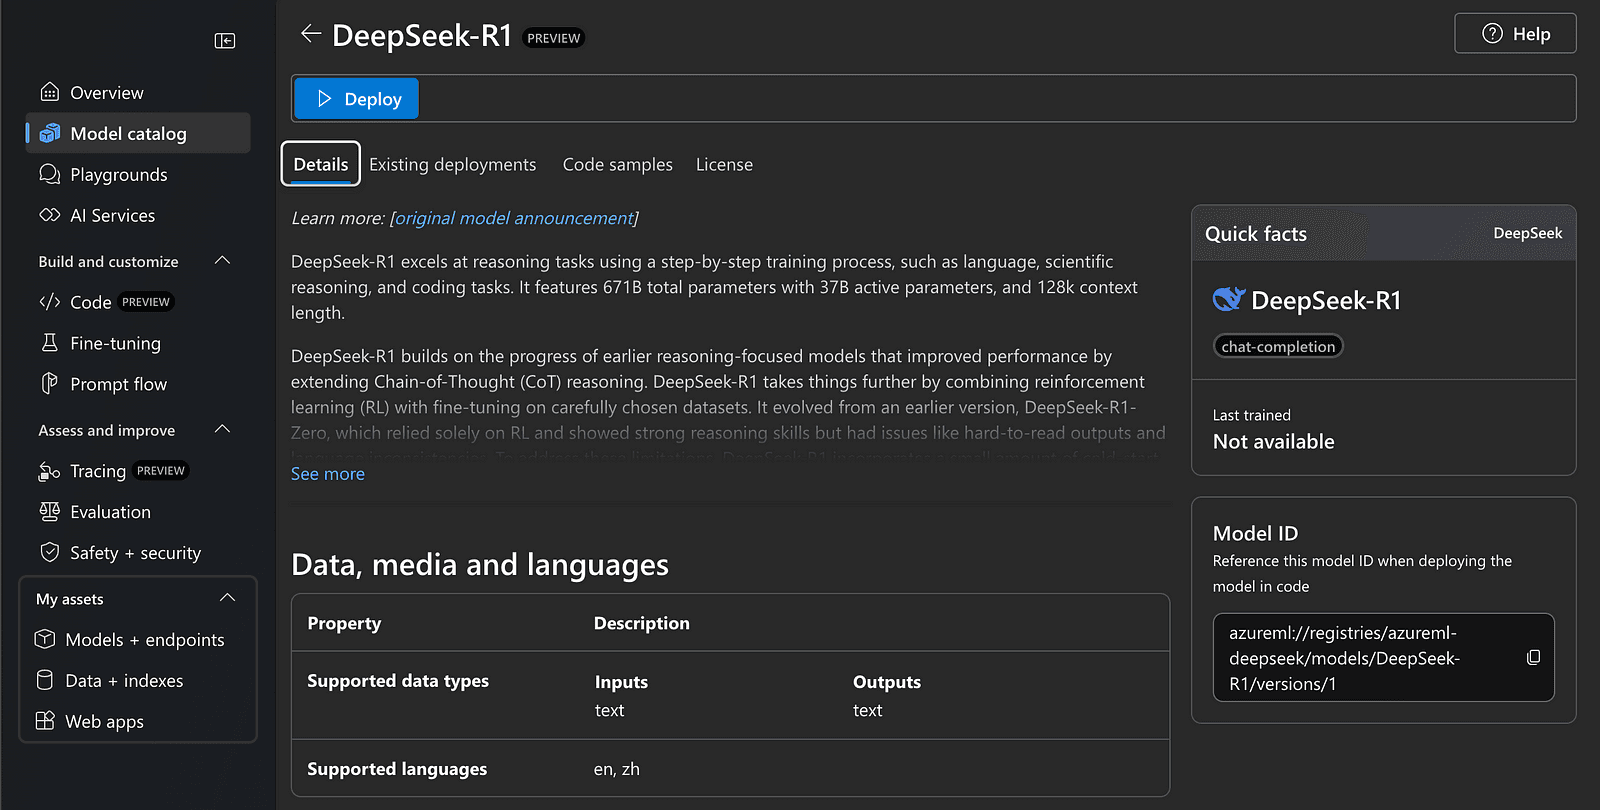
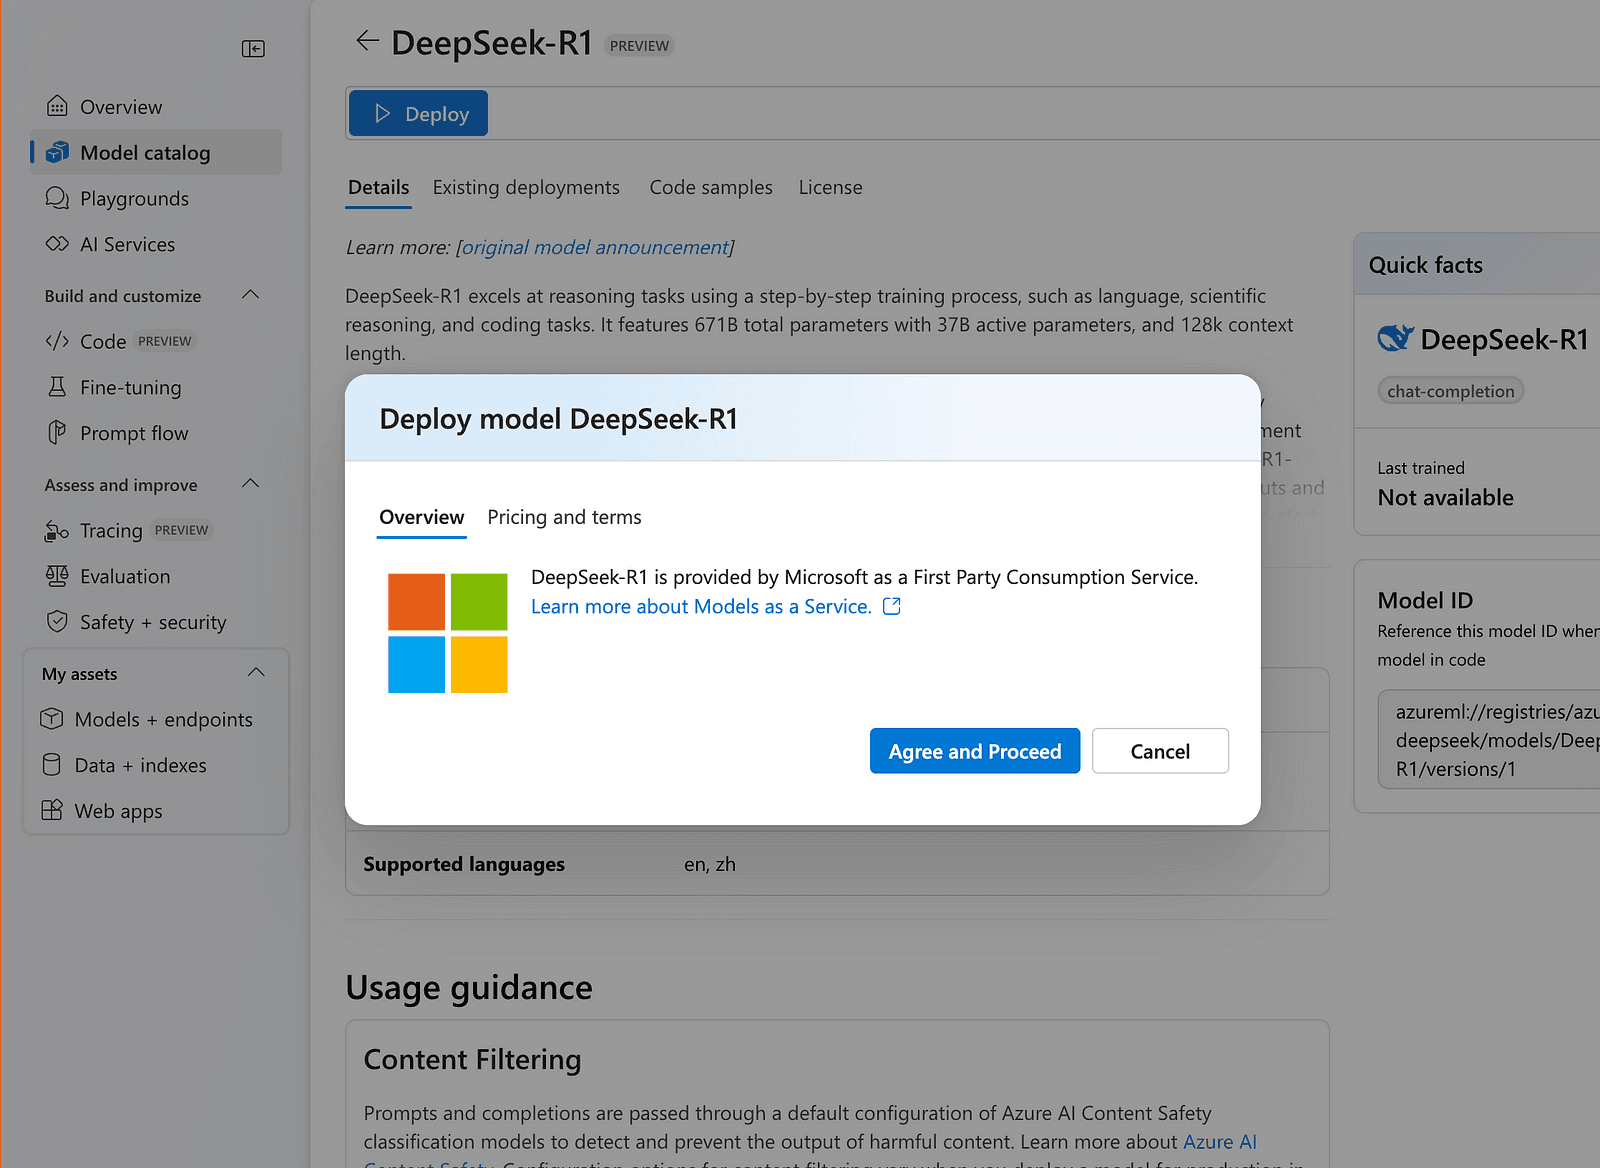
Navigate to your Project, and launch the Azure AI Foundry.
Navigate to the model catalog and select DeepSeek-R1, and click through the deployment options.

Best Practices for Using DeepSeek R1
Based on Microsoft’s guidelines and personal experience, here are some key tips:
Put all instructions directly in your user prompts rather than using system prompts
For mathematical tasks, instruct the model to “reason step by step” and use \boxed{} for final answers
When evaluating performance, run multiple tests and average the results
Pay attention to chain-of-thought content (<think> tags) if you’re showing it to end-users, as it might be more raw or contain “more harmful” text.
Microsoft claims that DeepSeek R1 underwent “rigorous red-teaming and safety evaluations,” and Azure AI Foundry includes built-in content safety by default:
DeepSeek R1 has undergone rigorous red teaming and safety evaluations, including automated assessments of model behavior and extensive security reviews to mitigate potential risks. With Azure AI Content Safety, built-in content filtering is available by default, with opt-out options for flexibility. Additionally, the Safety Evaluation System allows customers to efficiently test their applications before deployment. These safeguards help Azure AI Foundry provide a secure, compliant, and responsible environment for enterprises to confidently deploy AI solutions.
Azure’s DeepSeek R1’s Context Window Limitation
The 4K output token limit in Azure’s implementation is a significant constraint. While the model can process inputs of up to 128K tokens (roughly 400~500 book pages), its output capacity is limited to ~16 pages of text. This restriction likely enables Microsoft to offer the preview for free, as output generation typically demands more computational resources than input processing.
While this trade-off makes Azure’s implementation well-suited for tasks like document analysis and summarization, it may not be ideal for extended text generation or lengthy code completion.
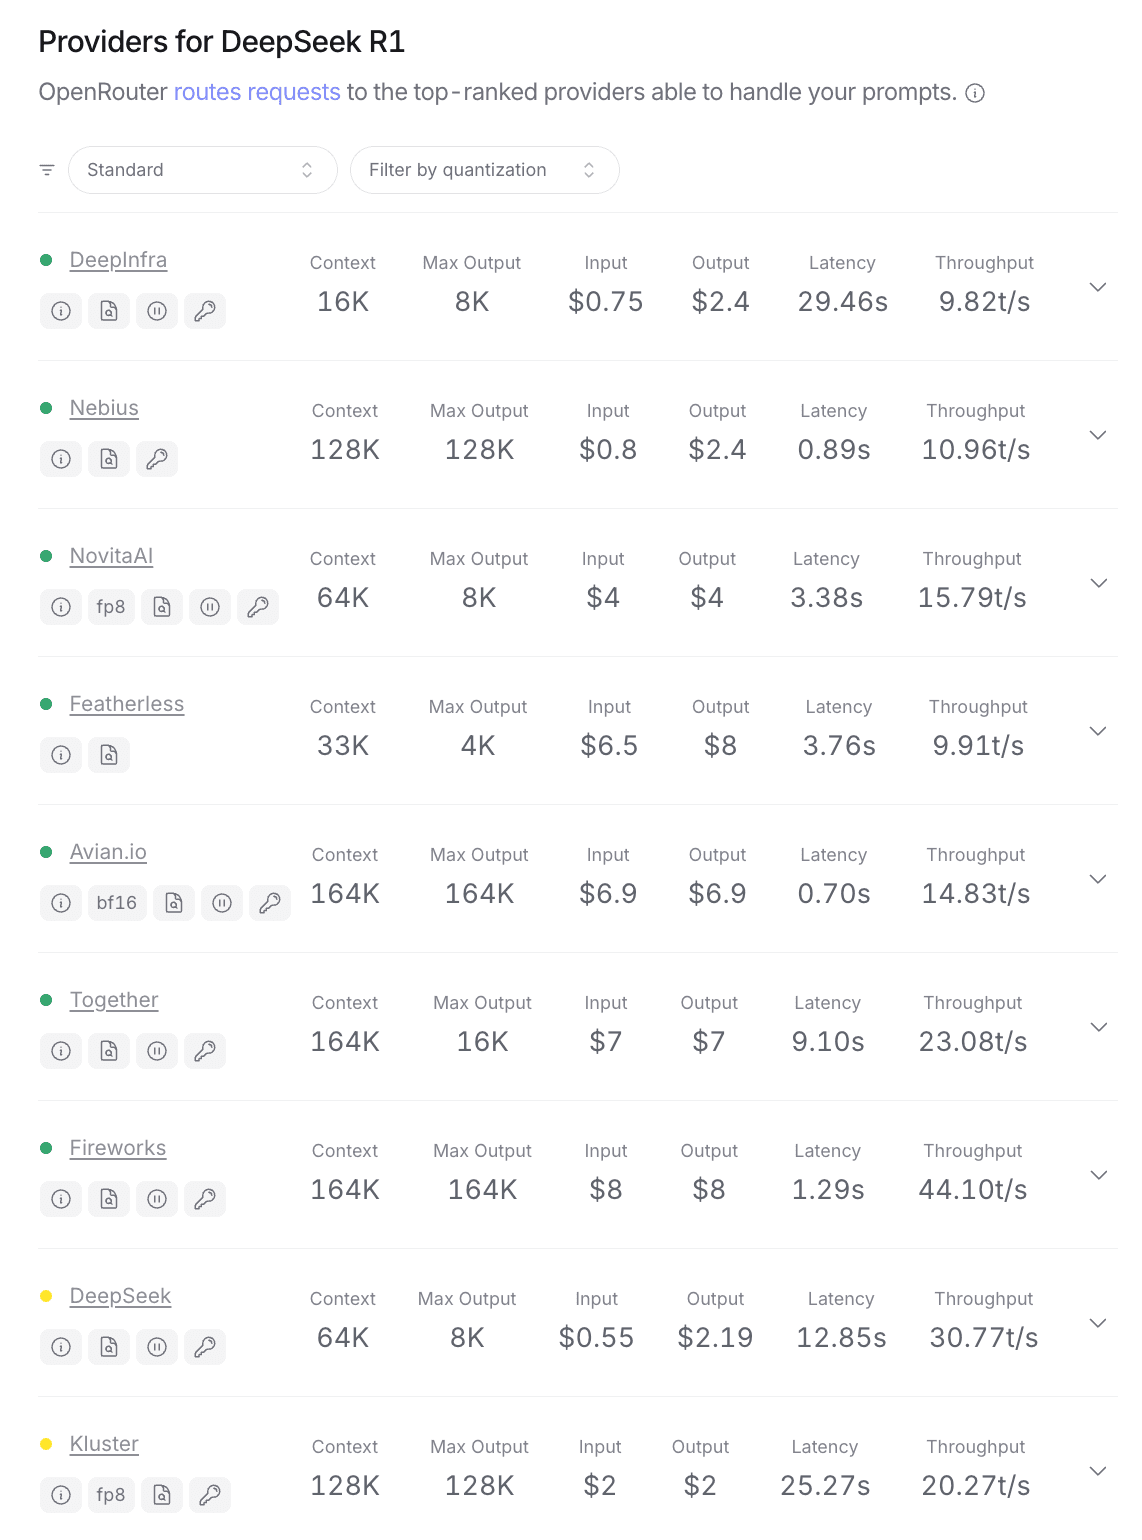
For applications requiring longer outputs, consider alternative deployments through serverless API providers, albiet at a higher cost. I’ll explore these alternatives and their trade-offs in detail in an upcoming post.
Conclusion
Setting up DeepSeek R1 on Azure AI Foundry is a straightforward process that opens up powerful AI capabilities for your projects. While the model has some limitations — like the 4,096-token output limit — its strength in reasoning tasks and generous input context window make it a valuable addition to any AI toolkit. Best of all, it’s currently available at no cost, making it an excellent opportunity to experiment with advanced AI capabilities in a production environment.